
![]()
Monday, January 8, 2024
Merriam-Webster defines fluent as capable of moving with ease and grace, effortlessly smooth and flowing, and having or showing mastery of a subject or skill. Musicians require fluency to perform with ease, and mastery of fundamentals builds fluency. Fluency leads to freedom.
Consider this:
- What should a flute player know how to do, when should they know it, and why does it matter?
- What can we do to lead them there?
If you are not a flute player, flute is likely one of the more challenging instruments to teach. Brass instruments are similar, and reed instruments are similar, but flute is just a little bit strange. This article is intended to provide an outline of a suggested flute pedagogy sequence to help build fluency through starting flutists, developing flutists, maintaining flutists, and advancing flutists.
Starting Flutists: First Sounds
Starting with headjoint sounds is an appropriate approach to teaching correct embouchure and tone. Try demonstrating the "finger flute" under your bottom lip for students to mimic; doing this with your right hand, first finger, establishes the direction the flute points (right) while confirming the correct placement of the lip plate in the correct spot on the chin.
Blow out the candle (don't spit on the cake) with a "pu"-shaped aperture (try saying "pu" and keep your lips in that shape); flute requires a natural, flat face with lips relaxed (not smiling).
It can be challenging to lead flute players to articulate (many start by breathing between each note rather than using the tongue to separate the air). The tongue should touch behind the top teeth on the roof of the mouth at the spot where the top teeth touch the roof of the mouth. Try asking your students to say "pretty" or "pu-tee" (like the "pu" shape followed by "tee") to force the tongue to articulate.
Starting Flutists: Instrument Assembly and Holding the Flute
Assemble the flute from the bottom up -- footjoint to body, then headjoint to body. Think Space Station docking; we want to push the parts straight together then twist, rather than angling pieces into one another, which is what leads to bent ends of the headjoint or body.
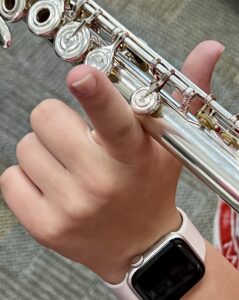
Left hand should be in the shape of an "L" with the knuckle bump resting against the flute. The right hand thumb is arguably the most important finger on the flute: this should be resting on its side underneath the key pressed down for F.
It can be tricky to share stands as a flute player because of the flute angle, try to give flutists their own stands or at least allow them to angle their chairs to make it easier to sit correctly.
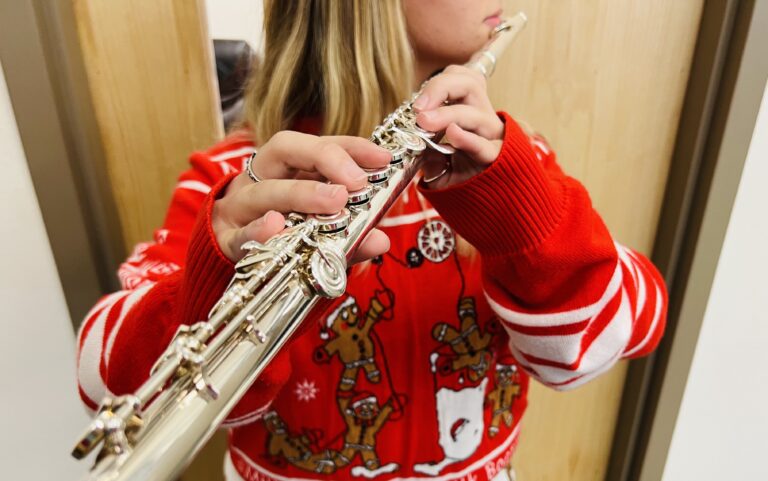
Where is the flute held? This comes as a surprise to many: the flute is held in front of your body.
"Flute Yoga" Exercise: "Marching Band" attention; push forward with the right hand (headjoint will fall onto the left shoulder if done correctly); lift the flute up (headjoint will be next to ear if done correctly); then turn the head left. Try this, and then check out your or your student's arms: they will be in front of the chest if the exercise is completed correctly. This also means that for a flute player to "face forward," their lower body will be facing a different direction than their upper body.
Click here to continue reading at banddirectorstalkshop.com.
| (417) 882-7000 | (573) 256-5555 | (816) 792-8301 |
| (417) 781-3100 | (405) 896-8111 | (479) 464-8877 |
| (918) 286-1555 | (636) 229-1904 | (913) 234-4454 |
| (316) 262-1487 | (417) 882-7000 |